I’ve been running a Blazor app on Heroku for a bit, but I decided to give Fly.io a try. Aside from the ease of deployment through their CLI, they boast some pretty cool, zero-configuration global deployment benefits:
Over 3 million apps have launched on Fly.io, boosted by global Anycast load-balancing, zero-configuration private networking, hardware isolation, and instant WireGuard VPN connections. Push-button deployments that scale to thousands of instances.
Since .NET Core 1.0 first release in 2016, Microsoft has made a Docker image available for the .NET runtime, making composing Docker containers and running .NET application a breeze. This has made hosting on services that support Docker (like Heroku and Fly) a breeze. To get started, you need Dockerfile in your project folder. Simply change the AppName.dll to match your executable name. I’m also running .NET 9.0 preview builds, so adjust accordingly.
| |
Deploying to Fly.io
Once you have your Dockerfile, you can deploy to Fly.io. Follow their guide to install flyctl. Configuring a new app, flyctl will auto-generate a fly.toml file:
| |
Once you’ve configured your app, you can just use fly deploy and flyctl will build your Docker container and deploy it to all of your machines. Depending on your regions, Fly will use a rolling deployment strategy to make sure you don’t have any downtime.
Environment Variables
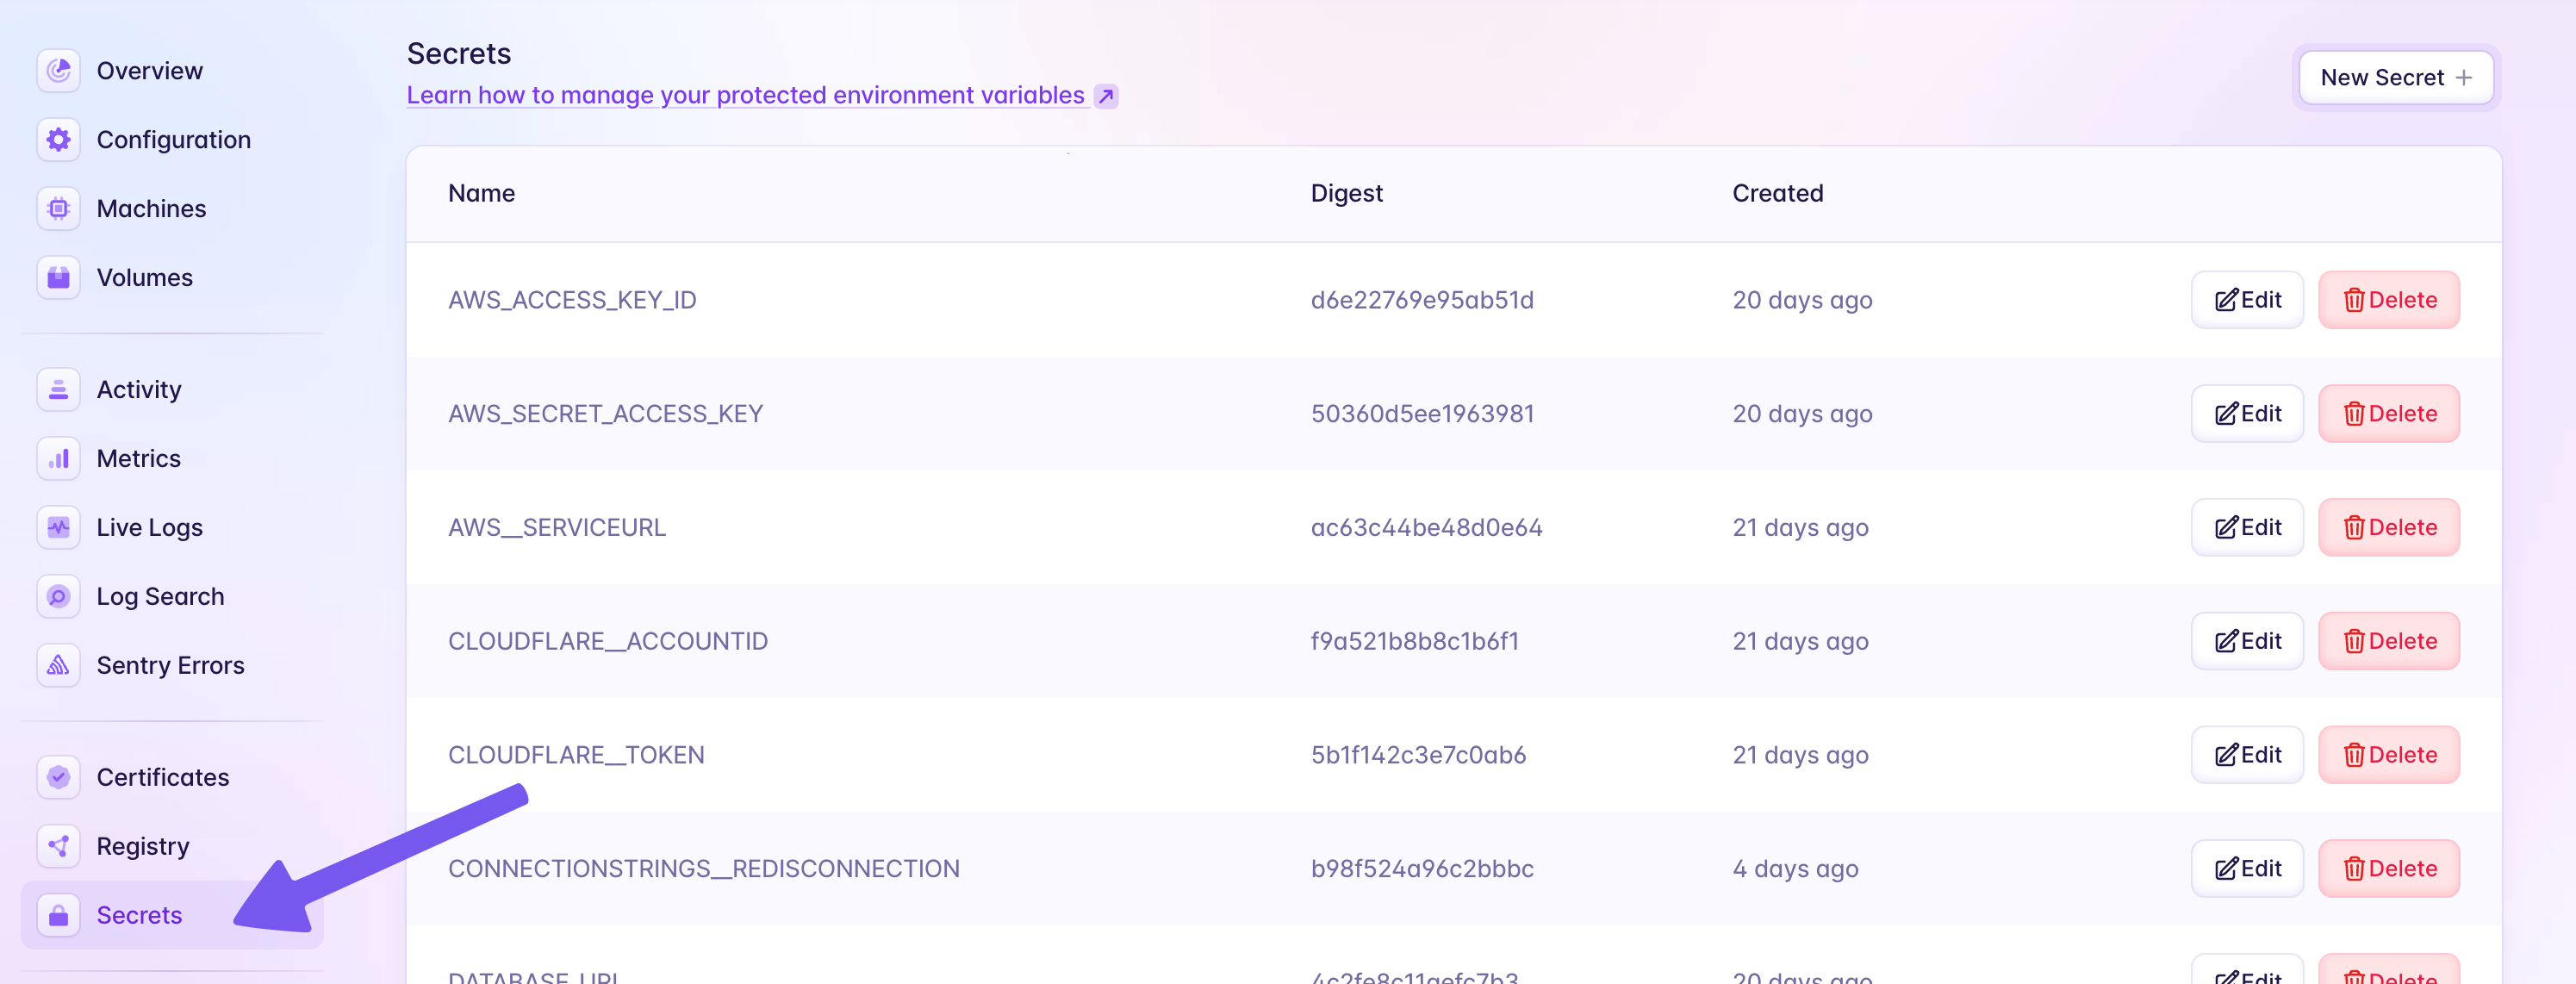
If you’re not familiar with Docker-based cloud deployment, configuration variables and secrets are typically deployed as environment variables. In the case of Fly, you can either store them in you fly.toml or in your dashboard:
In your application, you can access your environment variables using the following code, which will look for an environment variable first, then check your appsettings.json or appsettings.{environment}.json.
| |
If you have configuration stored in appsettings.json, you can use double underscores (e.g. __) to access nested values. For instance, to access your AWS profile setting:
| |
You would use:
| |
Which means in your fly.toml you can set an environment variable as AWS__PROFILE.
A Sticky Situation
One problem I haven’t quite solved yet, as it relates to Blazor, is that the Blazor server backend requires clients in a load balanced environment to be “sticky”, or in other words, always responding to the machine they originally connect to. Fly.io doesn’t officially support sticky sessions, but they do have some cookies and headers that will direct a request to a specific server, but it has some problems. In another post I’ll show you how I implemented middleware to set that cookie.
In the meantime, I’ve limited my deployment to a single machine.
Metrics
Fly.io supports Prometheus metrics for your application, giving you insights into how you’re utilizing your infrastructure. You can also feed custom metrics from your application into Prometheus and display them on the Grafana dashboard. I’m using OpenTelemetry which has some really cool built-in metrics for the ASP.NET hosting process. Here are the NuGet packages I’m referencing:
| |
Then I configure the Prometheus scraping endpoint using a non-public port:
| |
And finally adding this to my fly.toml to make Fly aware of that endpoint:
| |
And voila, ASP.NET hosting metrics in your Grafana dashboard:
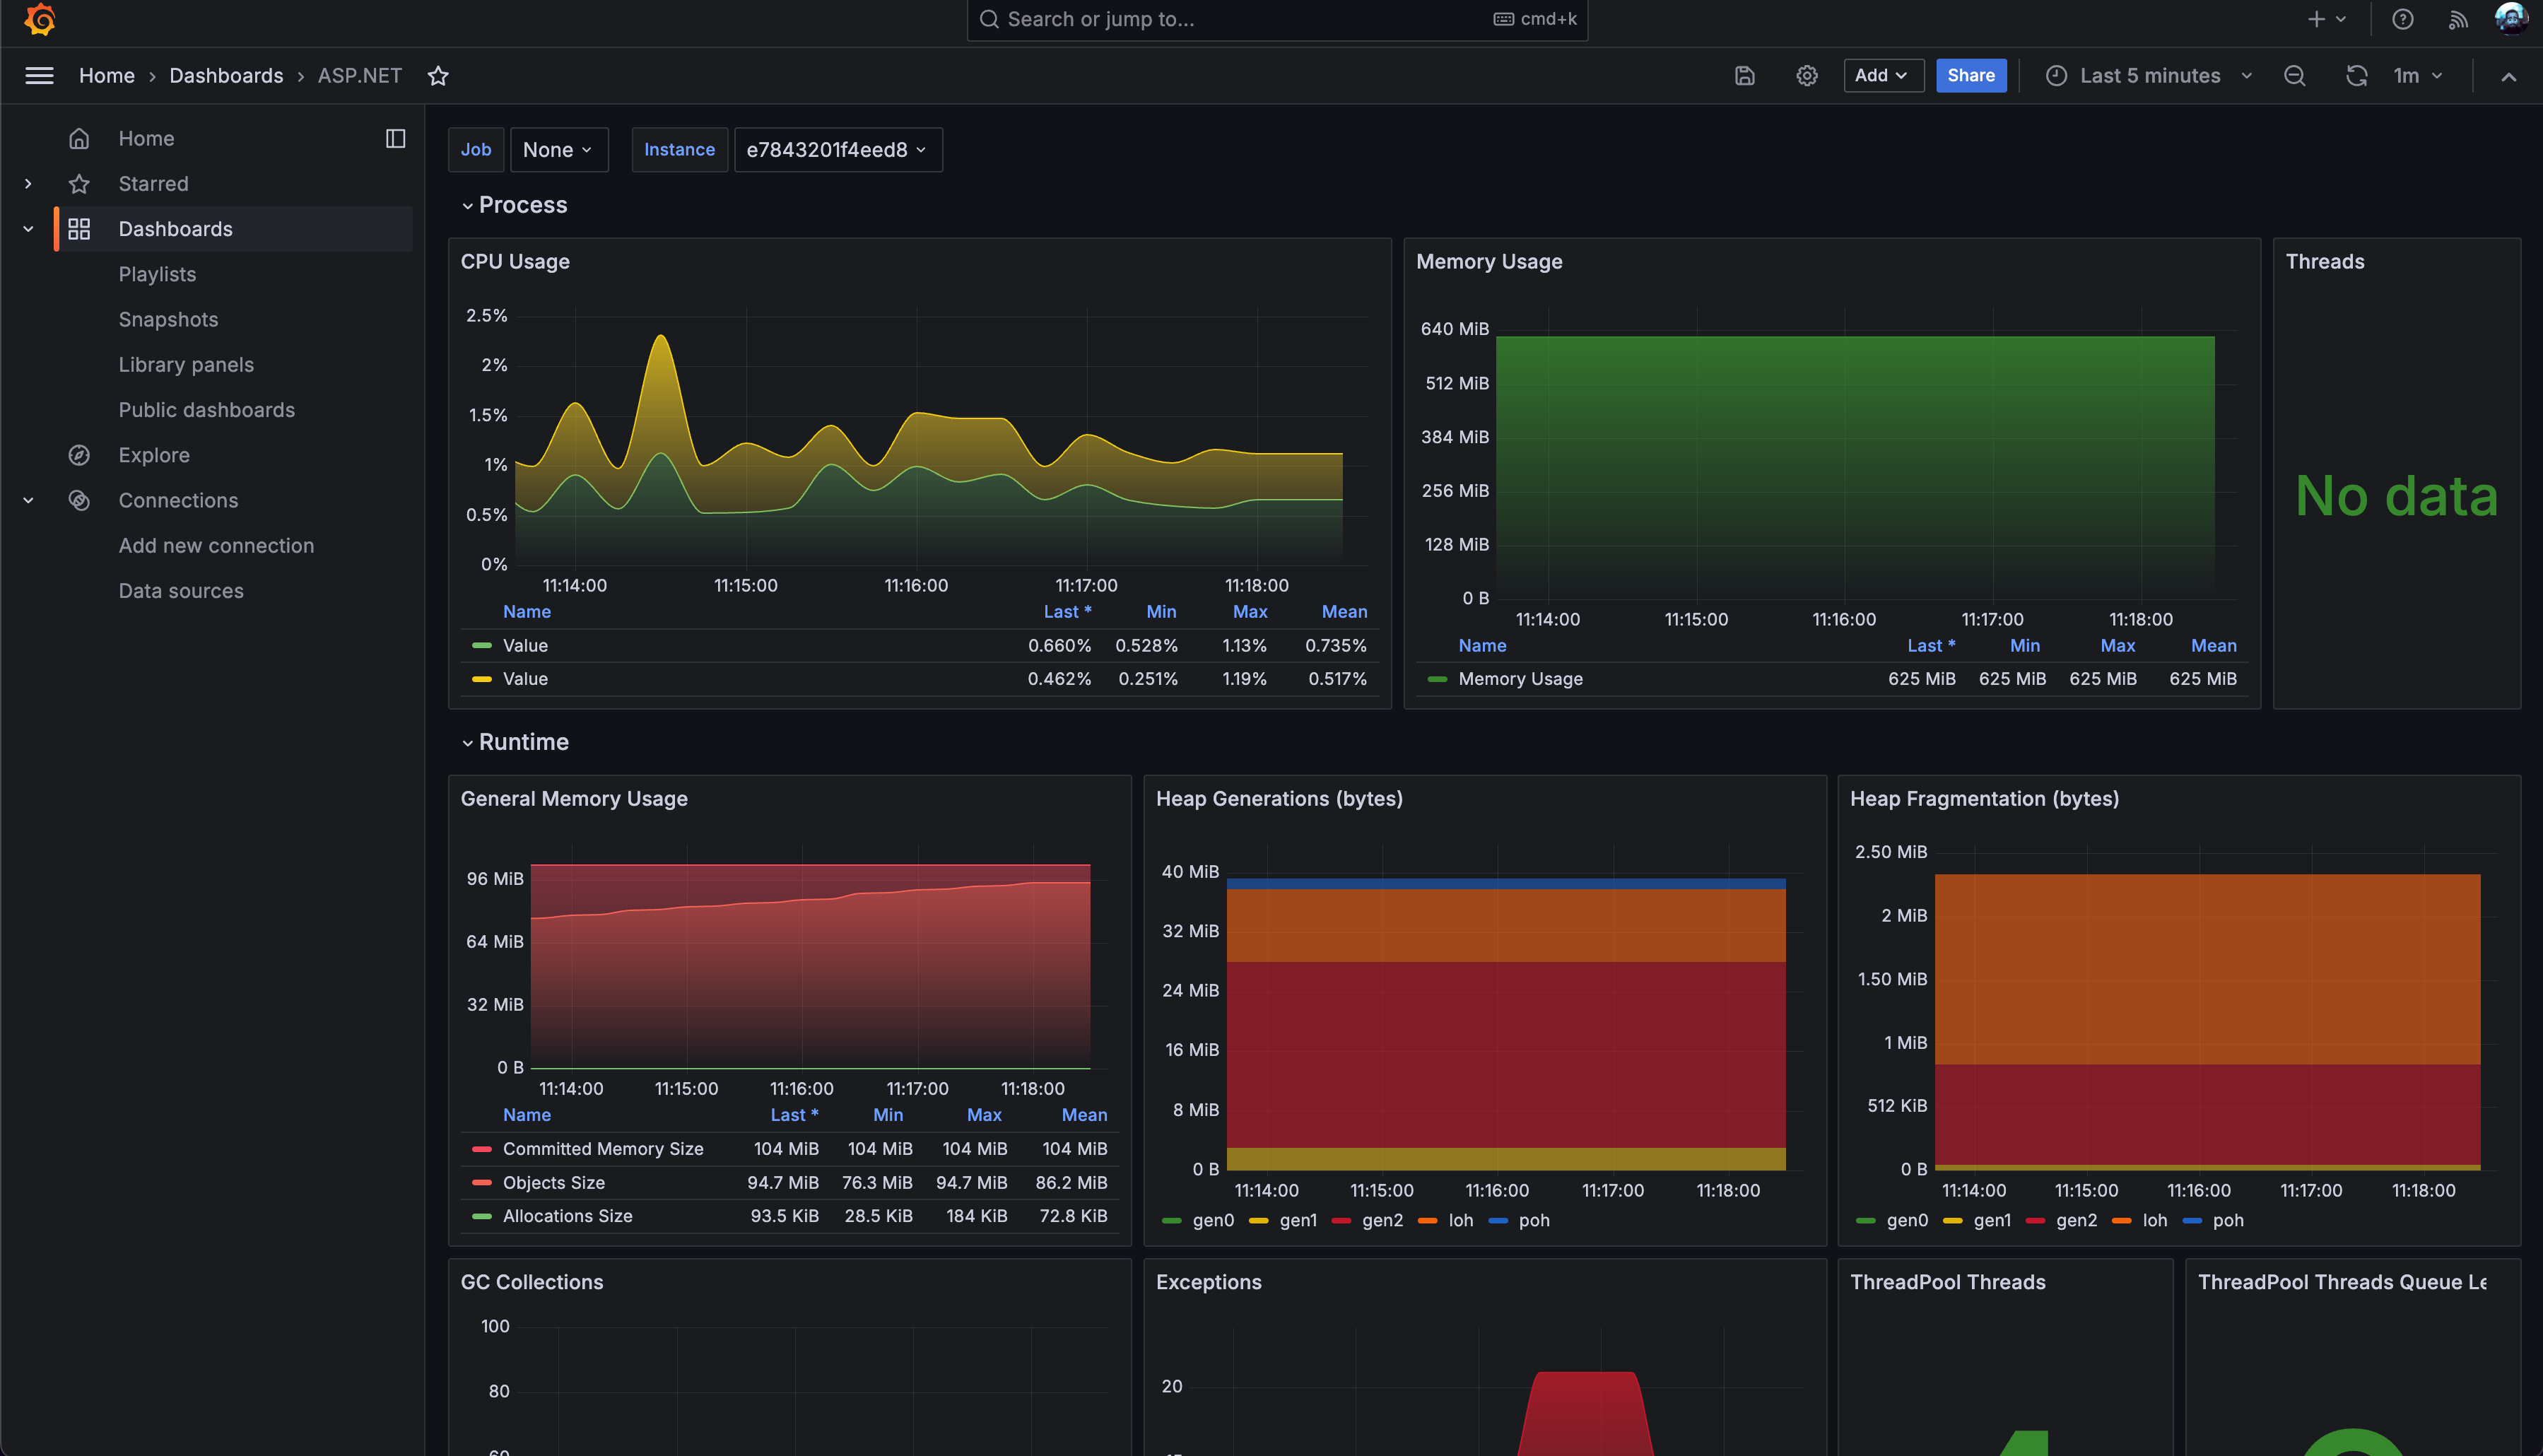
In a future post I’ll show you how to write your own custom metrics!
Conclusion
In conclusion, deploying a Blazor app on Fly.io offers several benefits, including ease of deployment, global deployment capabilities, and zero-configuration private networking. By following the steps outlined in this guide, you can successfully deploy your Blazor app on Fly.io using Docker containers. Additionally, you can leverage environment variables for configuration and take advantage of Fly.io’s support for Prometheus metrics to gain insights into your application’s performance. With these tools and techniques, you can confidently host your Blazor app on Fly.io and take advantage of its powerful features. Happy coding!